Tuesday, June 5, 2012

OSB hands on: JMS Producer Consumer Example

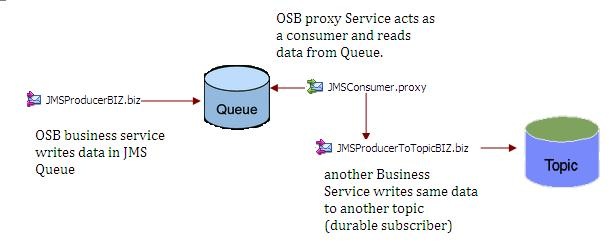
In this blog I have tried to show how we can use OSB business service and Proxy service to implement a JMS producer consumer example. Our objective is to build an OSB project which will do the following.
OSB_JMS
Create a sample Schema which represents data structure to be used
We need to create a Simple Schema which is used for reading and Writing data from JMS Queue/Topic

Configure “JMSProducerBIZ” OSB business Service:
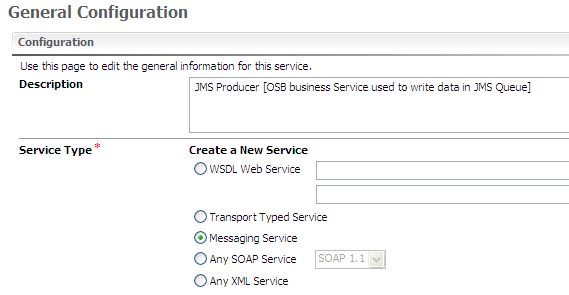
Step 1: In General Configuration Tab use “Messaging Service” as Service Type.
image
Step 2: In Messaging tab use “xml” as “Request Message Type”. Above created XSD is used for the xml request.
image
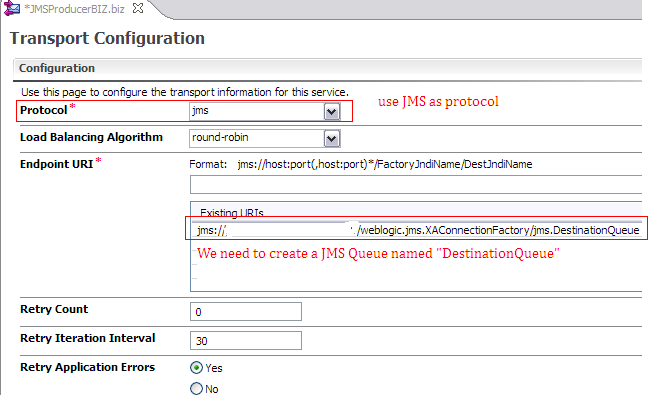
Step 3: In Transport configuration tab make below configuration. Please follow my earlier post for configuring JMS Topic and Queue. Follow below link http://anindyabhattacharjee.blogspot.in/2012/04/configuring-jms-for-publish-and.html
image
Step 4: In JMS transport tab make below Configuration
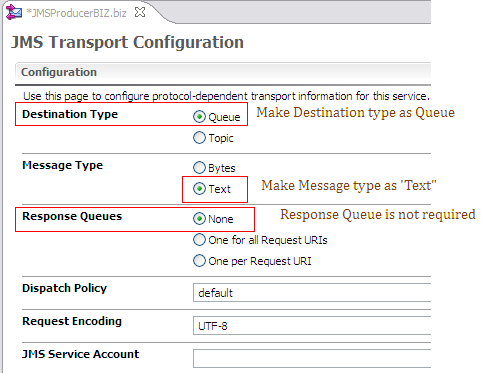
image
Configure “JMSProducerToTopicBIZ” business service :
Step 1 and Step 2 remains same as mentioned in above configuration steps. In “Transport Configuration” we need to keep below configuration settings.
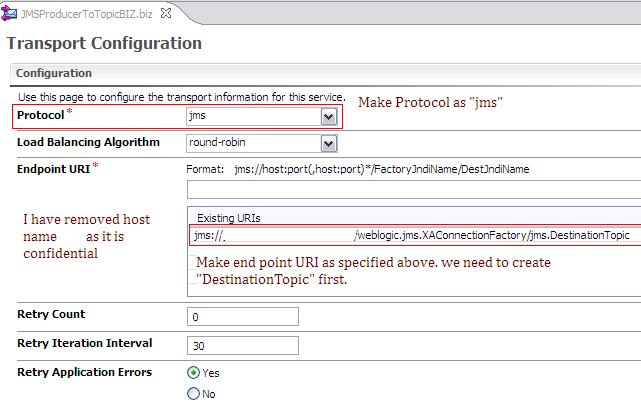
image
we have to make JMS Transport configuration settings like below 
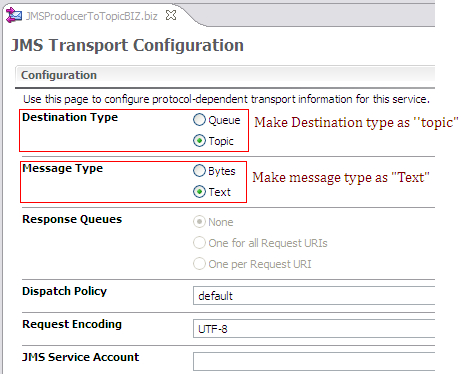
image
Configure “JMSConsumer.proxy” Service
Step 1: Make Service type as “Messaging Service” in General configuration tab.
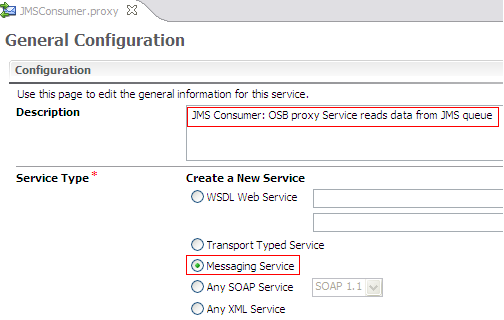
image
Step 2: Make transport configuration as below. I have removed host and port from below snap as it is confidential.
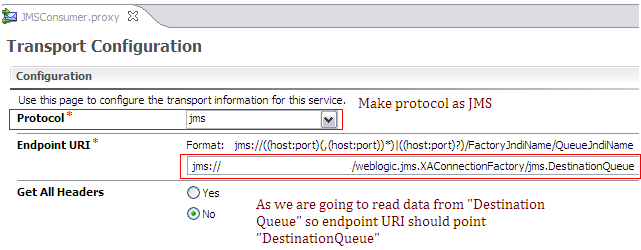
image
Step 3: Make “JMS Transport Configuration” as below.
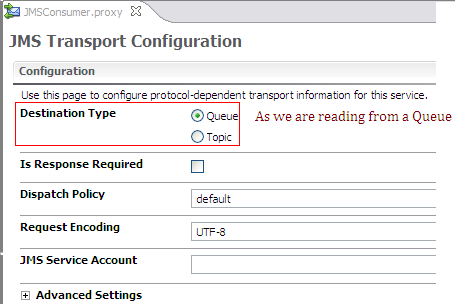
image
Step 4: At last message flow looks like as below. Routing node is used to write data in Topic.
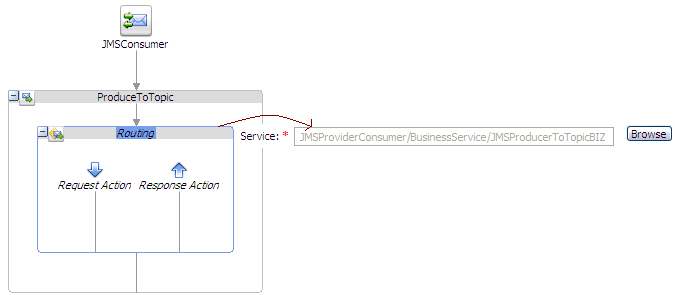
image

Test:
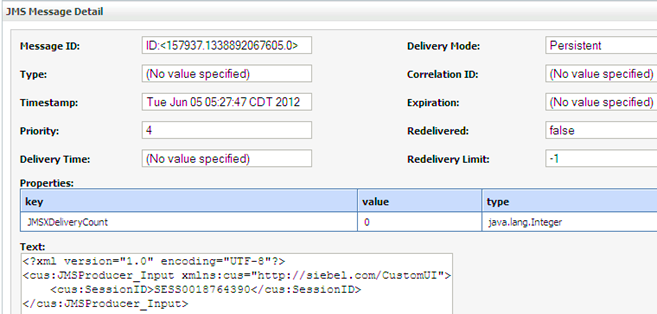
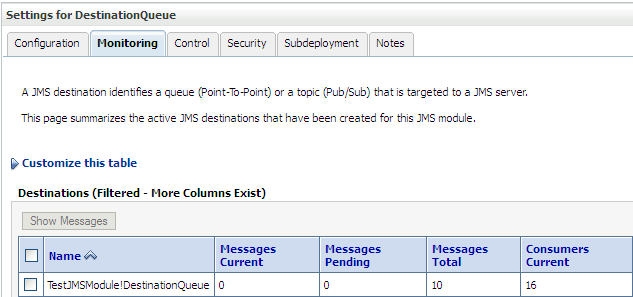
we need to Check how many messages are present currently in “DestinationQueue”. Below snap says total 9 messages are present in Queue.
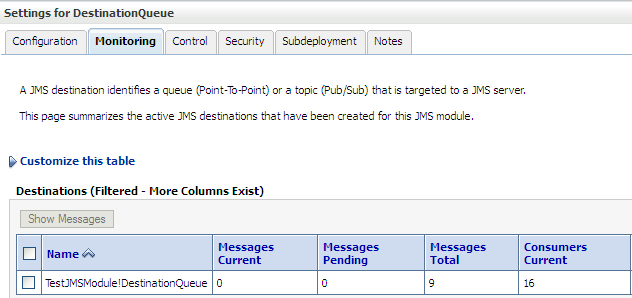
image
Run “JMSProducerBIZ” Business Service from OSB console and as a result we have 10 total messages in DestinationQueue.
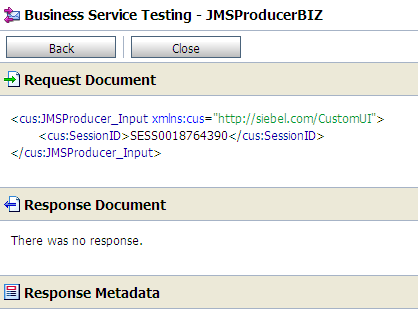
image
DestinationQueue: After execution of business service
image
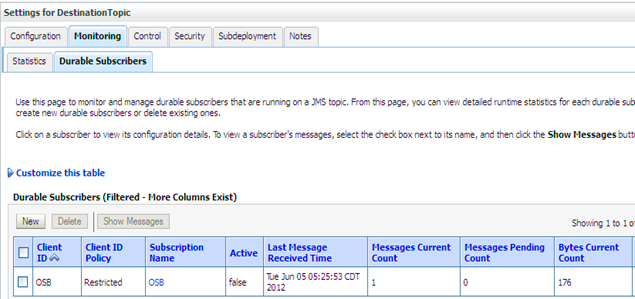
During my previous tests,  9 messages are consumed so far. So 10th message will go to Topic.
Destination Topic: image
image

Saturday, May 26, 2012

Work Around: Detail Table in ADF Pop Up Region not refreshed at runtime as it caches old data.


While developing a simple master detail application in ADF I came across this problem. My model structure is as follows. I have a JOB table having structure like [JOB_ID,JOB_TITLE,MAXSALARY,MINSALARY] an EMPLOYEES table having structure like[EMPLOYEE_ID,FIRST_NAME,LAST_NAME,EMAIL,PHONE_NUMBER,HIRE_DATE,JOB_ID,SALARY ,COMMISSION_PCT,MANAGER_ID,DEPARTMENT_ID].
My view query is like below
image
In below Picture ADF popup ‘Employee List by Job Title’ gives the UI representation of the above view. And the Master table UI represents the JOB table. When user clicks on a particular row in master table, ADF popup shows all Employees having that particular JOB_TITLE. As shown in below picture
image
So far we are good and page renders properly and while user clicks on a particular row then Pop UP shows expected employee details . But the problem comes as user clicks on another row then Pop UP shows old data instead of new data i.e when user clicks on ‘Accountant’ row then it shows all EMPLOYEES who are ‘Accountant’. But when user clicks on ‘Programmer’ then also it shows all EMPLOYEES  who are ‘Accountant’ instead of ‘Programmer’.
My bean code is as follows


My Application module implementation code is as follows


Work Around:
After investigating a bit when I see the log file I am bit surprised, It is actually executing the view but the Pop Up is not able to show the updated data.

image As a work around I have used partial target programmatically while user closes the pop up. And it solves the problem.

Code for Pop up is as follows


Here “d1” is document id used in UI page.

Monday, April 30, 2012

Work Around: SOA 11g (OSB) response to SIEBEL always shows HTTP 500 error

In this blog I am going to share a typical problem I have encountered few days ago while developing an OSB interface for my current project. Scenario is simple SIEBEL is going to call our OSB proxy service and then OSB will pass the request to another service provider after doing certain enrichment to the request. As it is a synchronous call to the service provider OSB will receive a response message in response PIPELINE and return the response to SIEBEL. This is a happy path execution and we observed no problem while our interface goes in happy path.

Problem arise when our interface fails due to some internal error and execution goes to error handler. In our error handler we are creating a common error response with all error details  and send the response back to SIEBEL.  But we observe  that SIEBEL always receive HTTP 500 error.

As a workaround we have changed the OSB reply activity “with success” from “with failure”.

 image

The problem is if we keep OSB reply “with failure” then it sends a SOAP fault to SIEBEL and SIEBEL acknowledges it as HTTP 500 error. So reply “with success” sends the error response as a xml payload instead of SOAP fault. So SIEBEL acknowledges proper error Response.

Monday, April 16, 2012

Configuring JMS for Publish and Subscribe

In this blog I have shown a step by step approach to configure JMS settings in Oracle Web Logic server for Publish/Subscribe approach. Please refer below link for the document.

http://www.box.com/s/713fa40b31e16917ebe4

this document shows

Creating JMS Server:                          1
Creating JMS Module:                         4
Creating a QUEUE.                             6
Creating a Topic.                               8
Creating a Connection Factory:             9

Wednesday, February 22, 2012

Using Customized Email template in BPEL Email Activity


In this post I am going to share an example of sending email using BPEL email activity where email body uses a customize template. We can follow http://technology.amis.nl/blog/6019/configure-soa-suite-11g-for-sending-email-notifications-with-google-mail blog for configuring our SOA server with Google SMTP settings. This step needs to be done at first level otherwise we can’t send email using our BPEL email activity.

In this post I am not focusing on how we are sending email using BPEL email activity, instead I am trying to show how we can use a template in email body.

Please download attached ZIP file from below location http://www.box.com/s/sx35479gbtvs386qhhqk for complete project that I have used here. One small change needs to be done. After downloading that project please modify the to and cc domain value in DVM file so that BPEL process can follow suitable to address and cc address.