In this blog what I am trying to implement is communication between two ADF pages. Here I have a main page (Figure 10) where user can click on the search icon and control shifts from that page to a dialog page (Figure 11) . And when user clicks the done button from the dialog page then selected values (here I am using Empid as an example) will come from dialog page to main page for further use. Please refer below snaps


Source Page Destination Page
Now I will show as step by step way how we can achieve it.
Creating a view is primary one as I had already shown in my previous blog.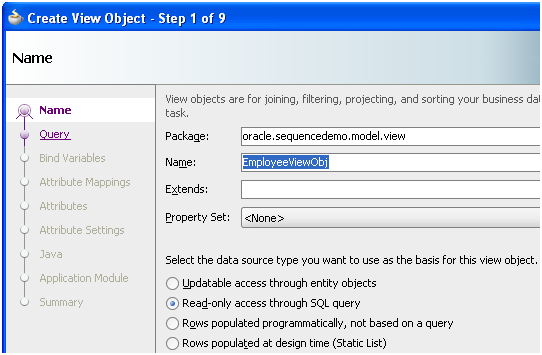
Figure 1 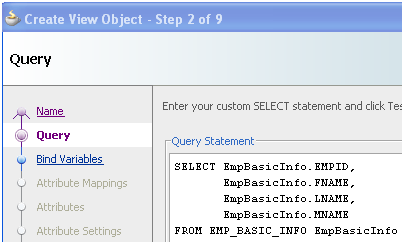
Figure 2
let’s design the destination page first i.e.the page where user can select an employee and the data is returned to the “Add Project page”. From Application Module we need to select the view which is got created as Figure 2 above and drag it to the page and then we will be prompted to select a container. Here I have selected trinidad table.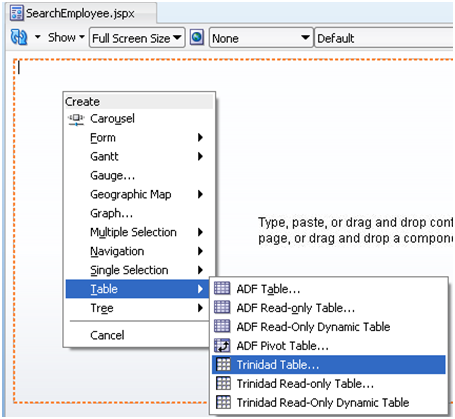
Figure 3
Figure 4
Figure 5
Figure 6
In destination page we need to add a commandlink and it’s code looks like below
- <f:facet name="actions">
- <tr:commandLink>
- <tr:image source="/Icons/done.png" inlineStyle="width:30px; height:27px;"/>
- </tr:commandLink>
- </f:facet>
where entry for “tr” and “f” are as follows xmlns:f=http://java.sun.com/jsf/core and xmlns:tr=http://myfaces.apache.org/trinidad.The image I have used like this .
.
Please make sure that you have included below libraries.
Figure 7
And Finally the page looks like
Figure 8
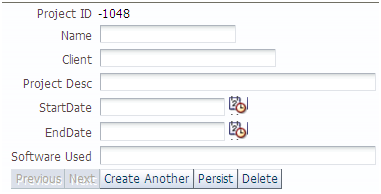
Below figure shows the code snippet of source page (Add Project) from where user is navigated to the page shown in Figure 8. After selecting the container type as ADF form (after following the step like drag and drop view objects from data control palate), we get all viewable columns as wrapped in <af:panelLabelAndMessage>. As our objective is to add a command link beside Employee id which will direct us to the destination page we need to modify default ADF panel form. Before adding the command link the code will look like as left side and after adding it will look like as right side (code shown in red color is added only for command link). 
Figure 9
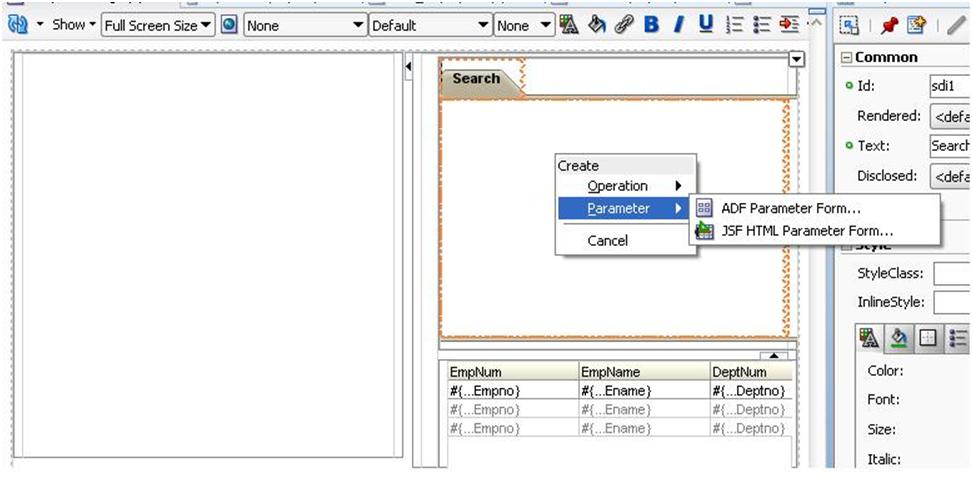
Now here comes the tricky part , when user in destination page selects a particular row and click on the "done" button on left top corner then what will happen? Till now what I have shown the code will go nowhere as there is no ActionListener defined.
So we need to define ActionListener as follows
- Go to Properties of <tr:commandLink > and select Property Menu for Action Listener ( ) and select edit.
- A new dialog wizard will open. We can create a new Managed Bean and method by clicking new or we can select an existing one.
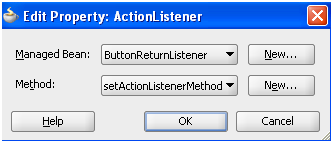
Figure 12
- We can use JSFUtils.java (download Source code from: http://www.box.net/shared/mnhtms45hm ) to get Application module reference. We need to add it in our project.
- My customization on managed bean (download source code from : http://www.box.net/shared/u5gn9g9rz8 )is as follows
Step 1: Getting Application Module reference :
Please refer below link http://anindyabhattacharjee.blogspot.com/2010/06/get-application-module-reference.html
Step 2: (ActionListener functions) Earlier we had created an attribute named "Empid" and its data source is set as <ProjectAppModuleDataControl.EmployeeViewObj1 >. Now we need to set the value of this attribute to the value specified by user.
Step 2.1: Take value from user specified row
- public String getSelectedRowValue() {
- System.out. println ("In Set Action Listener for Search Employee"); //Getting Application Module Reference as specified in Step 1. dataControlName is set to ProjectAppModuleDataControl
- ProjectAppModule prjappmdl = ( ProjectAppModule )getApplicationModuleForDataControl(dataControlName); Getting selected row of EmployeeViewObj1 view.Earlier we had created the read only table based on EmployeeViewObj1 and select the "Row selection" behavior getCurrentRow() gives reference of that row.
- Row row = prjappmdl. findViewObject ("EmployeeViewObj1"). getCurrentRow() ; // get the Empid value from selected row.
- String str = row. getAttribute ("Empid"). toString() ;
- System.out. println ("Employee Id selected " + str);
- return str;}
Step 2.2 : Set value from Step 2.1 to created Attribute. This method is used as ActionListener
- public void setActionListenerMethod( ActionEvent event) { //Get Selected Row value
- String str = getSelectedRowValue();
- FacesCtrlAttrsBinding attribute = null;
- System.out. println ("Entering ButtAction");
- BindingContainer bindings = BindingContext . getCurrent() . getCurrentBindingsEntry() ; // Get List of all Attributes
- List attr = bindings. getAttributeBindings() ; // traverse all Attributes
- for ( Iterator it = attr. iterator() ; it. hasNext() ; ) {
- Object o = it. next() ;
- if (o != null) {
- if (o instanceof FacesCtrlAttrsBinding ) { //assign object reference from list of attributes to FacesCtrlAttrsBinding
- attribute = (( FacesCtrlAttrsBinding )o);
- System.out. println ("total attribute Count: " + (attribute. getAttributeCount() ));}}}
- String[] attributename = attribute. getAttributeNames() ;
- for ( int i = 0; i < attributename. length ; i++) {
- System.out. println ("attribute name " + attributename[i]);
- if (attributename[i]. equals ("Empid")) {
- attribute . setInputValue (str);
- System.out. println ("Attribute Value " +attribute. getInputValue ()); }}}
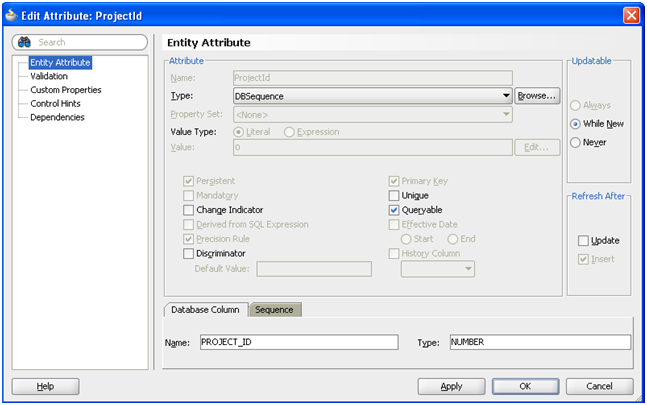
We have created an attribute as figure 6. Now I am using that attribute value in line 16.
Now we need to set a ReturnActionListener method in source page.Till now what we achieve is taking the value from user selected Row in destination page, but how come the data becomes available when control comes back to the main page from destination page. For that we need to define a method in returnListener attribute at source page.
setEmployeeID is a custom method defined in Application module Implementation class.
- public void searchEmployeeReturnListener(ReturnEvent retevent) {
- System.out.println("In Return Listener"); //Getting Return Value
- oracle.jbo.domain.Number retval = ( oracle.jbo.domain.Number )retevent. getReturnValue ();
- System.out. println ("Return Value " + retval. toString ()); //Use Returned value in main page //Getting ApplicationModule reference programatically
- ProjectAppModule prjappmdl = ( ProjectAppModule )getApplicationModuleForDataControl(dataControlName);
- prjappmdl. setEmployeeID (retval);
But please note that We need to add this method as client interface so that the method is accessible from Managed bean . In Application Module XML file we need to add this
- <ClientInterface>
- <Method Name="setEmployeeID">
- <Return Type="void"/>
- <Parameter Name="num" Type="oracle.jbo.domain.Number"/>
- </Method>
- </ClientInterface>